


Harvest Losses can be “that bad!”
You may not want to know this, but canola losses out the back of the combine can be “that bad.”
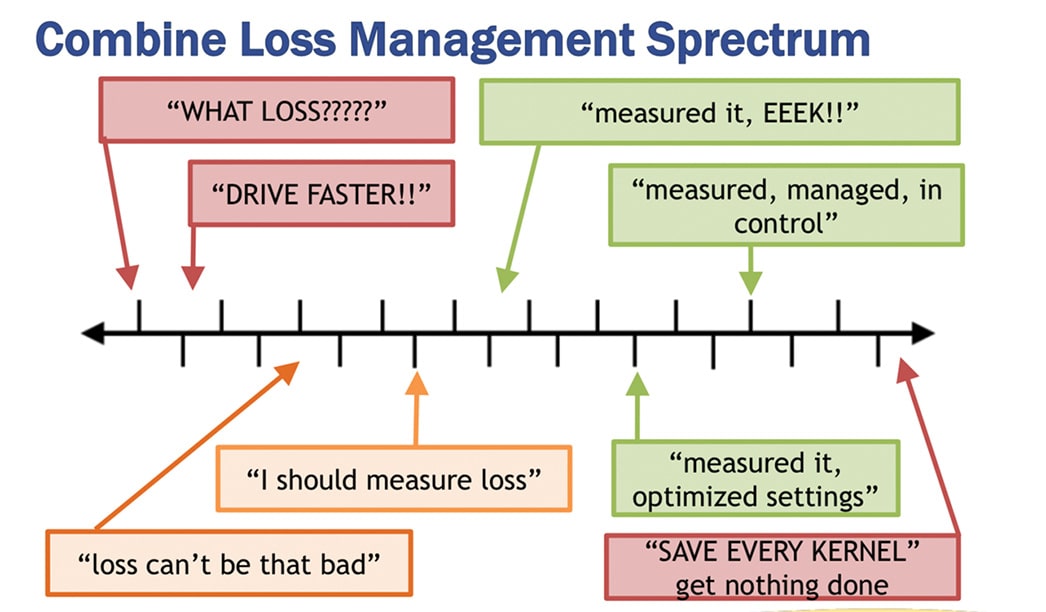
Joel McDonald emphasized this point during his presentation at Combine College earlier this year in Brandon and Lethbridge. To all those farmers who say, “Losses can’t be that bad, can they?” McDonald replies, “Yes, they can be.”
In challenging harvest conditions or with excess speed or with a poorly-set combine, canola harvest losses can exceed 10 per cent of yield. That could be the profit margin – blown out the back of the combine. But with some attention, losses of one or two per cent are achievable and don’t have to come at the expense of productivity, he says.
McDonald farms at Kyle, Saskatchewan and has been working with PAMI on canola harvest loss research. He knows about the pressure to get harvest done, but says the best economic decision is not the one based entirely on harvest speed.
This article will explain how to check for losses (combine loss monitors aren’t useful without drop pan ground truthing) and how to adjust the combine to reduce those losses. The goal for each individual farmer is to find their right balance between harvest efficiency and lower losses.
How to check
On his farm, McDonald checks for canola combine losses every time he starts a new crop. He also checks both of his combines. “Even though we run two of the same model of combine, you can’t assume losses will be the same for both,” he says. “Parts may be worn differently on each, which can influence threshing and cleaning. Big differences in loss could hint at a bigger maintenance issue.”
Here are the steps to make a proper loss assessment:
Step 1. Choose your drop pan. You can use anything from a plastic bucket on a stick, to a garbage can lid you toss under the combine, to a full-width pan attached to the combine underbelly and released with a switch. Calculate the square feet of the chosen pan.
Angela Brackenreed, agronomy specialist with the Canola Council of Canada, recommends a pan that closely matches the discharge width. “This will limit sampling error as the amount of seed coming out the back can range quite a bit between the centre and the sides of the shoe,” she says. A full-width pan captures all of that variability.
Step 2. Disengage the chaff spreader and straw chopper. With these tools disengaged and out of the way, all straw and chaff drop straight down into the pan. This provides a more accurate measurement.
Step 3: Use the pan to gather a sample.
Step 4: Clean the sample. Once the combine has passed over the pan, take all contents from the pan and carefully separate the seeds from the chaff and straw. Both McDonald and Brackenreed prefer to use grading screens like you’d see at the elevator. A bucket and blower can work, although you don’t want so much air that it blows seeds out of the bucket.
Step 5: Measure the seed on a per-square-foot basis. How much canola (by weight or volume) did you capture on a per-square-foot basis? With that measurement, use the PAMI/CCC tables to find the combine concentration factor (CF) and the loss in bu./ac. For example, if the cut width (swather or straight cut header) is 30 feet and the combine discharge width is five feet, then the concentration factor is 6 (30 divided by 5). If the captured sample is 25ml of clean seed per square foot and the combine concentration factor is 6, the loss level for that sample was 5 bu./ac. Apps are available to quickly run these numbers for you.
Use these loss measurements to help calibrate the combine loss monitors. At the moment the pan is released, make note of the loss monitor reading. Do this each time and keep a log. With repeated loss measurement, farmers will start to figure out what the loss monitors are really telling them.
“Loss monitors are a great tool but if they’re not calibrated they can be really deceiving,” Brackenreed says. “An uncalibrated monitor can indicate whether losses are getting better or worse, but they don’t indicate the actual size of the loss. Calibration through repeated drop pan measurements can help estimate a bushel per acre loss.”
| To find the value in this chart when using collection pans greater than 1 sq ft, divide the volume or weight measured by the square footage of the pan first. | |||||||||
| Concentration Factor (CF) | Loss lb./ac. | ||||||||
|---|---|---|---|---|---|---|---|---|---|
| CF | 1 | 4 | 5 | 6 | 7 | 8 | 9 | 10 | |
| Loss Collected Behind Combine in 1 ft² in Millilitres (ml/ft²) | 0.1 | 0.4 | 0.5 | 0.6 | 0.7 | 0.8 | 0.9 | 1.0 | 10 |
| 0.3 | 1.0 | 1.3 | 1.6 | 1.8 | 2.1 | 2.3 | 2.6 | 25 | |
| 0.5 | 2.1 | 2.6 | 3.1 | 3.6 | 4.2 | 4.7 | 5.2 | 50 | |
| 0.6 | 2.5 | 3.1 | 3.7 | 4.4 | 5.0 | 5.6 | 6.2 | 60 | |
| 0.8 | 3.1 | 3.9 | 4.7 | 5.5 | 6.2 | 7.0 | 7.8 | 75 | |
| 1.0 | 4.2 | 5.2 | 6.2 | 7.3 | 8.3 | 9.4 | 10.4 | 100 | |
| 1.3 | 5.2 | 6.5 | 7.8 | 9.1 | 10.4 | 11.7 | 13.0 | 125 | |
| 1.6 | 6.2 | 7.8 | 9.4 | 10.9 | 12.5 | 14.1 | 15.6 | 150 | |
| 1.8 | 7.3 | 9.1 | 10.9 | 12.8 | 14.6 | 16.4 | 18.2 | 175 | |
| 2.1 | 8.3 | 10.4 | 12.5 | 14.6 | 16.7 | 18.7 | 20.8 | 200 | |
| To find the value in this chart when using collection pans greater than 1 sq ft, divide the volume or weight measured by the square footage of the pan first. | |||||||||
| Concentration Factor (CF) | Loss bu./ac. | ||||||||
|---|---|---|---|---|---|---|---|---|---|
| CF | 1 | 4 | 5 | 6 | 7 | 8 | 9 | 10 | |
| Loss Collected Behind Combine in 1 ft² in Millilitres (ml/ft²) | 0.2 | 0.8 | 1.0 | 1.3 | 1.5 | 1.7 | 1.9 | 2.1 | 0.25 |
| 0.4 | 1.7 | 2.1 | 2.5 | 2.9 | 3.3 | 3.8 | 4.2 | 0.5 | |
| 0.6 | 2.5 | 3.1 | 3.8 | 4.4 | 5.0 | 5.6 | 6.3 | 0.75 | |
| 0.8 | 3.3 | 4.2 | 5.0 | 5.8 | 6.7 | 7.5 | 8.3 | 1.0 | |
| 1.0 | 4.2 | 5.2 | 6.3 | 7.3 | 8.3 | 9.4 | 10.4 | 1.25 | |
| 1.3 | 5.0 | 6.3 | 7.5 | 8.8 | 10.0 | 11.3 | 12.5 | 1.5 | |
| 1.7 | 6.7 | 8.3 | 10.0 | 11.7 | 13.4 | 15.0 | 16.7 | 2.0 | |
| 2.1 | 8.3 | 10.4 | 12.5 | 14.6 | 16.7 | 18.8 | 20.9 | 2.5 | |
| 2.5 | 10.0 | 12.5 | 15.0 | 17.5 | 20.0 | 22.5 | 25.0 | 3.0 | |
| 2.9 | 11.7 | 14.6 | 17.5 | 20.5 | 23.4 | 26.7 | 29.2 | 3.5 | |
| 3.3 | 13.4 | 16.7 | 20.0 | 23. | 26.7 | 30.1 | 33.4 | 4.0 | |
| 3.8 | 15.0 | 18.8 | 22.5 | 26.3 | 30.1 | 33.8 | 37.6 | 4.5 | |
| 4.2 | 16.7 | 20.9 | 25.0 | 29.2 | 33.4 | 37.6 | 41.7 | 5.0 | |
Use the Common Concentration Factors table to calculate the concentration factor for the combine. Then, once a drop pan sample is collected and measured (by weight or volume), use the tables above to figure out the loss in bushels per acre. Find these tables and how to use them in the ‘Combine Seed Loss Guide.’
| Discharge Width (ft) | CF (X) | ||||
|---|---|---|---|---|---|
| 3 | 4 | 5 | 6 | ||
| Cutting Width (ft) | 12 | 16 | 20 | 24 | 4 |
| 15 | 20 | 25 | 30 | 5 | |
| 18 | 24 | 30 | 36 | 6 | |
| 21 | 28 | 35 | 42 | 7 | |
| 24 | 32 | 45 | 48 | 8 | |
| 27 | 36 | 45 | 54 | 9 | |
| 30 | 40 | 50 | 60 | 10 | |
Are the losses acceptable?
“A realistic threshing loss goal is around one to two per cent of total yield,” Brackenreed says. “It is not realistic to achieve zero harvest losses in canola.”
If losses are in that optimal range after drop-pan checks, the farmer may not need to make significant changes. If losses are really low, it may mean an opportunity to speed up a little. But if losses are too high, be prepared to spend some time making adjustments and checking how losses change with each adjustment.
Do you like to see a spotlessly clean sample? A very clean sample may actually contribute to higher losses because the cleaning system may be blowing out a lot of seed in the quest to remove all chaff. “This is an important point. You may want to accept some chaff in the sample.”
Do you like to see a spotlessly clean sample? A very clean sample may actually contribute to higher losses because the cleaning system may be blowing out a lot of seed in the quest to remove all chaff. “This is an important point. You may want to accept some chaff in the sample,” Brackenreed says.
Company experts
Who can farmers turn to for advice on their models? The best place to start is your local dealer. They will know who within the company can provide guidance on combine settings to reduce harvest loss.
You might also get good tips from the companies that make some after-market add-ons. Lane Stockbrugger, SaskCanola director and farmer from Englefeld, Saskatchewan, says this about the MAD concave they put on their combine: “Think diesel tuner or 6” lift for your diesel truck. They are beefier. Stronger. Easier to work with. And the company has a real knack for customer service. They may be slightly rough around the edges but they know their stuff. And they appreciate their customers. We bought a set of concaves for one of our CR combines and it does a better job of threshing and cleaning the grain than the stock concaves. When we bought it though they provided very specific combine settings that were quite different than the settings we had been using for years. And it worked. Low throw over. Cleaner sample.”
How to reduce losses
Brackenreed recommends a thorough check at the start of the harvest season. “Every year is so different. Crop conditions, environmental conditions, combine upgrades and worn components can mean that the settings that worked last year don’t work nearly as well this year,” she says. “It can be frustrating, but that’s why you need to check.”
Set aside a couple of hours to do the first check of the season, she says. “I don’t want to say it will take 15 minutes when it really could take two or three hours to work through a few settings adjustments,” she says. “After that, just check when you have significant differences in crop or environmental conditions.”
The Combine Optimization Tool will guide combine operators through the settings to check. To improve performance in the separation system, the tool suggests adjustment to rotor/cylinder speed, concave clearance and modifications to rotor vanes and concave grate covers. To improve the cleaning system performance, the tool provides a specific sequence of adjustments for sieve spacing and fan speed.
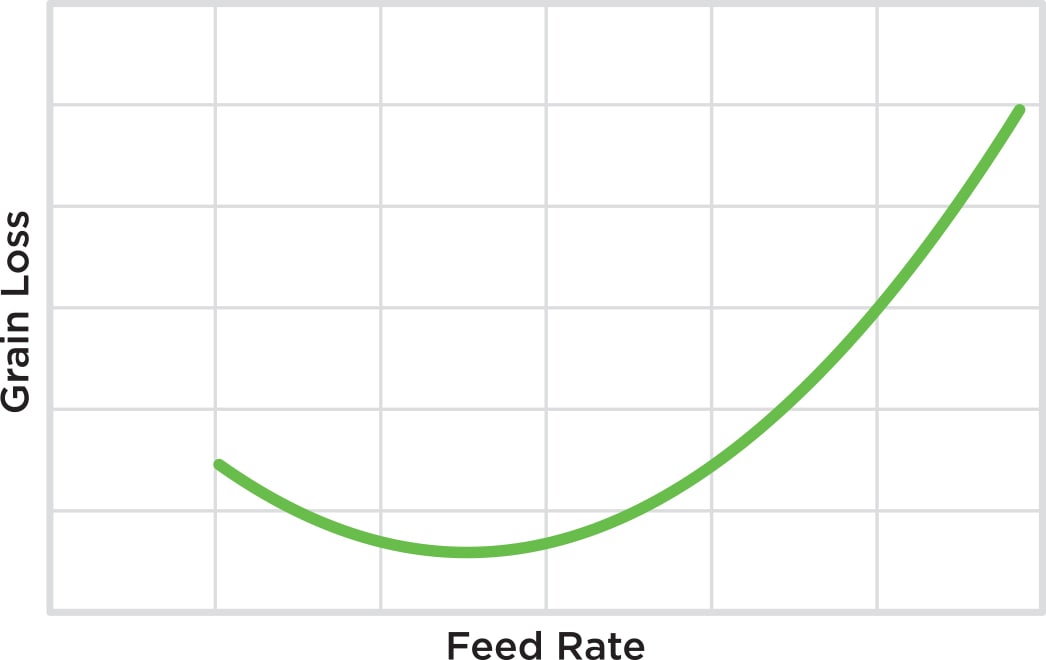
Remember to make just one change at a time and check between each change. “Start with preferred settings, the ‘book’ settings, and when making changes start with the easiest ones,” Brackenreed says. “Don’t jump to switching out concaves and fixing all worn components, which can take a lot of time. Instead, consider crop feed rate as step one. Am I maybe driving too fast? If losses are high, back off on the throttle a little bit and see if that makes the difference.”
Does straight-combining canola require a pre-harvest aid?
Do you need a pre-harvest spray to reduce losses or improve efficiency when straight combining canola? CCC agronomy specialist Ian Epp presented on this topic at Combine College. Here are the highlights:
- Assess the field at around 60 per cent seed colour change (around recommended swath timing) to check crop uniformity and calendar date to see if you need a pre-harvest aid to help with uneven or slow-drying crop or high numbers of green weeds that could impede smooth harvesting. If the field is clean, maturing evenly and on time, you may not need a pre-harvest aid. (Angela Brackenreed says a standing crop with ripe pods but slightly green stems actually harvests very well. She compares that situation to super-dry treated or swathed stems that easily thresh and can overload the cleaning shoe.)
- One size doesn’t fit all. Be flexible with the decision. Assess each field each year to see if a spray is worthwhile. In a dry year with early-maturing crop, you might not need a pre-harvest aid. If some crops are a little later, you might leave them to naturally cure with frost.
- The product choices:
Glyphosate alone. Glyphosate provides effective weed control, but will not speed crop dry-down. Wait until the seed moisture content is less than 30 per cent moisture in the least mature areas of the crop before applying glyphosate.
Glyphosate with Heat. Heat has both contact and systemic activity, and glyphosate is purely systemic. Spray at 80 per cent brown seed. This combination is usually ready to harvest at least 7 days after treatment.
Reglone. Reglone is a desiccant, used to dry-down crop. It works fast and will stop crop progress. Label application is very late – 90%+ brown seed – to make sure crop is almost fully mature. Canola is usually ready to harvest 4 to 7 days after treatment. - Do not skimp on water. Higher water rates helps improve performance in this window, and is especially important with contact herbicides applied on a thick canopy.
In general, pre-harvest aids will increase cost but reduce harvest difficulty. This was shown in a PAMI study comparing swathed canola and three straight cut scenarios: naturally ripened, sprayed with Heat and glyphosate, sprayed with Reglone. The same study also showed no difference in yield between treatments and no significant difference in quality. Reglone treated strips were harvested earlier than the other three treatments.
Ground speed also relates to crop flow into the combine. Adjust the reel (and if possible, knife position) or look to more permanent header adjustments, like auger finger timing, if having feeding difficulties. “It is absolutely critical to have uniform feeding of material into the machine,” Brackenreed says. “It is difficult to correct for poor feeding with setting adjustments.” As part of this, avoid doing loss checks in areas of the field that are particularly uneven relative to the majority of the field.
Watch the Harvest loss video here.
From there, work from front to back – from threshing to separating to cleaning until you have losses down to an acceptable level. With each change, consider how that one change might influence separating and cleaning downstream. “Say you decide to increase rotor speed to increase threshing. That one change may increase the break-down of the straw and chaff, which will change the way the material reacts to fan speed and how it will move through the sieves,” Brackenreed says. “So if you’re now experiencing more losses, it might not be directly related to the increase in rotor speed. It might be an indirect result of changing how that material is broken up and what might correct it could be more or less fan or open and close sieves at the back end.”
She adds, “Generally speaking, overloading the shoe tends to be the limiting factor in a cured swath crop whereas rotor losses can be the limiting factor in a crop that is not as dried down.”
McDonald reminds farmers that “there is no such thing as magic combine settings.” It will help to get outside advice from the manufacturer (especially local specialists who know the crop and typical harvest conditions) and from combine forums. And, adding to Brackenreed’s comment about driving too fast, McDonald says the harvest speed conversation should be about bushels per hour, not acres per hour. A heavy crop will require lower ground speed, but the real question is: Are you within the combine’s optimal range of bushels per hour?
“We don’t get paid for harvesting acres, we get paid for selling bushels,” he says.
Do you like to see a spotlessly clean sample? A very clean sample may actually contribute to higher losses because the cleaning system may be blowing out a lot of seed in the quest to remove all chaff. “This is an important point. You may want to accept some chaff in the sample.”
As farmers start to recognize the settings that provide the best performance for crop conditions (tough, really dry, etc.), they can dig into harvest economics.

McDonald outlines a few scenarios. Say for example, a farm has two combines working at 4 mph and the loss is 3 bu./ac. Those same combines operating at 3.2 mph may have losses of only 1 bu./ac. If this lower ground speed adds 15 hours to the total harvest but adds $19,000 in extra yield, which scenario would you choose? If you want to save yield and harvest faster, would it pay to buy a third combine? These are all scenarios that McDonald says are part of the harvest loss management discussion, and it’s a discussion that can only be done effectively after losses are measured. “Don’t depend on gut feel,” he says.
So how does he encourage a farmer make loss measurement, which can be a hassle, into a permanent part of the harvest operation?
“Find ways to make sampling easy,” McDonald says. For example, get a drop pan that keeps you out of the dust, and use a set of screens to quickly separate the seed from the chaff.
Brackenreed adds that “anything is better than not checking at all.”
PAMI surveys combine loss
PAMI surveyed dozens of fields this harvest to measure combine losses in canola fields across the Prairies. Results will be posted over the winter. Email pami@pami.ca or visit the website to see the report.